With wedding season around the corner, most brides-to-be are stressing about budgets and décor. Well, ladies don’t fear the option of doing it yourself! My sister recently got married in October and, oh yes, she was that kind of bride that stalked Pinterest for almost all her décor. And of course, she came to her crafty little sis to duplicate her pins!
So, to help you lucky ladies out with great wedding décor I’m going to attempt to give written tutorials on how I made her table centerpieces, head table arbor, and an extra display board. FYI, some of these will definitely be easier with a handyman. So if you have one available, use him!
Please, please, please don’t hesitate to ask if you have questions about any of these creations or need a more in-depth explanation of how to do a section of them.
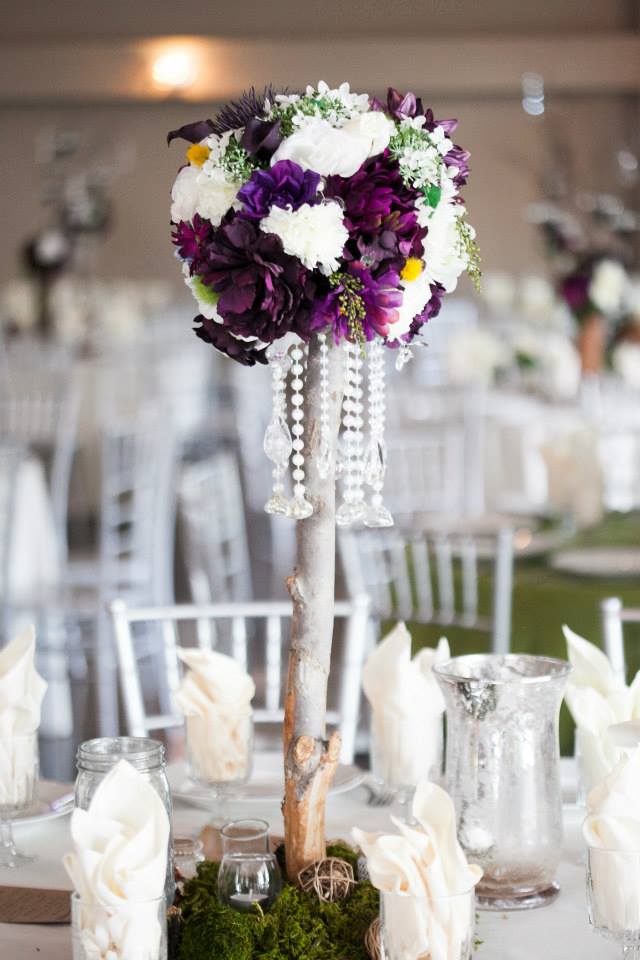
This first one, I like to call “The tall truffle”. This centerpiece was our medium sized centerpiece between the three types. This one is fairly easy! You’ll need a square 4X4 piece of wood for the base (it does not have to be a thick piece of wood because this centerpiece shouldn’t be top-heavy where it would fall over). Here’s your first phone call to your handyman …unless you’re comfortable with tools, then go for it! You’ll need a branch cut from a tree… 2-3 inches in diameter and cut it to your preferred length for the centerpiece height (ours were 2 feet in length). Make sure the cuts are straight, this will make things a lot easier. Drill your square platform base into one side of the branch piece and drill another (long) screw in the other side with about 2 inches still showing. You’ll need a Styrofoam ball for the top truffle part. We used silk (fake) flowers for most the centerpieces (believe me, she was adamant about real flowers till she saw a quote from the florist) so you will need lots of fake flowers and lots of variety in them too… However, the truffle centerpiece would look great with all the same type of flowers too. And if you haven’t guessed it, you just shove the fake flowers in the Styrofoam till the truffle is full. Here’s a helpful hint! When you’re snipping the flowers from the original bouquet it’s much easier to shove the flowers into the Styrofoam when there is a stem to work with, so keep a 1-1.5 inch stem still attached to the head of the flower. Also, leave a little bare circle somewhere in that truffle (this is where you will attach the bottom branch part to it). Once you have your beautiful truffle full of flowers, find the bare spot and you can either drill a hole with an electric drill or somehow start a hole in the Styrofoam. Then you’ll place your truffle on the branch piece, bald spot facing down, the nail sticking out from the branch will be pushed in the hole you already started in the Styrofoam. If you need to reinforce the attachment with hot glue, go for it! Just keep in mind, these centerpieces are easier to transport with branch base and flower truffle ball not attached. To finish off the table, we found green moss to cover the platform base and rustic potpourri pieces to scatter on the moss.
This centerpiece was our tallest kind of centerpiece. To start this one is the same as the first! The square base (to stablize the centerpiece) drilled into the branch bottom, but don’t drill the second screw on the other end! Instead, you’ll need to drill a hole into the open branch end and find a full-looking twig branch for the top part to stick into this hole. Please reinforce with hot glue! This one will need it! At this point, check to make sure this can stand on its own! We don’t want it to fall over on your guests at the table. From here, I just plucked silk flowers from bouquets and hot glued them on the top part of the cut branch. Don’t be afraid to use different sized flowers and longer ones that make a waterfall-look down one side. The main portion of the centerpiece is done! We added jewels and lanterns to the top branch pieces to make it look more glamorous! The jewels are actually made from Christmas ornaments!
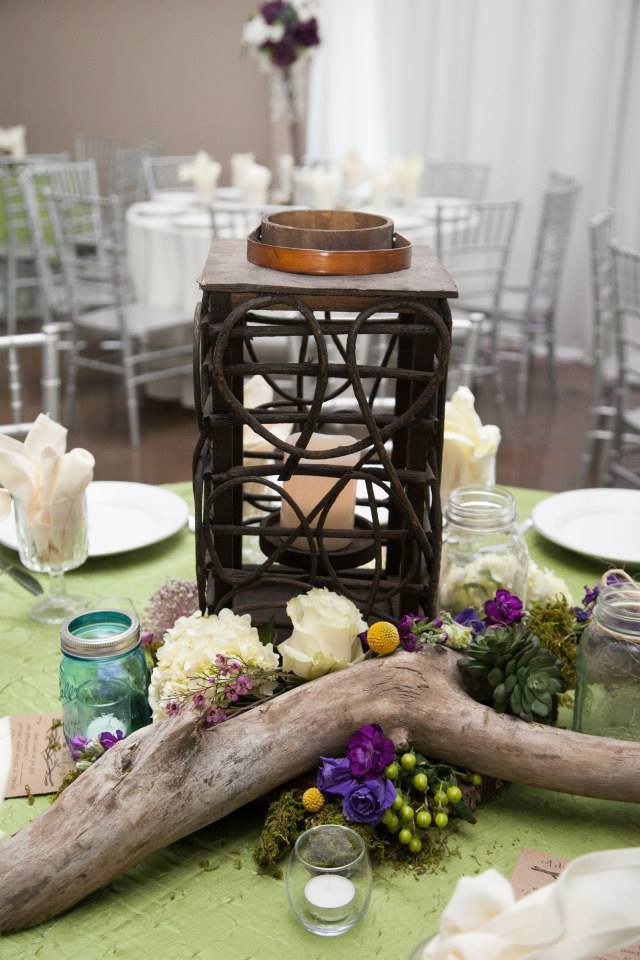
The third kind of centerpieces do not have much crafting to them, simply because we just placed a piece of drift wood, store bought rustic lantern, mason jars, and a few real flowers stuffed in the driftwood nooks to complete those tables.
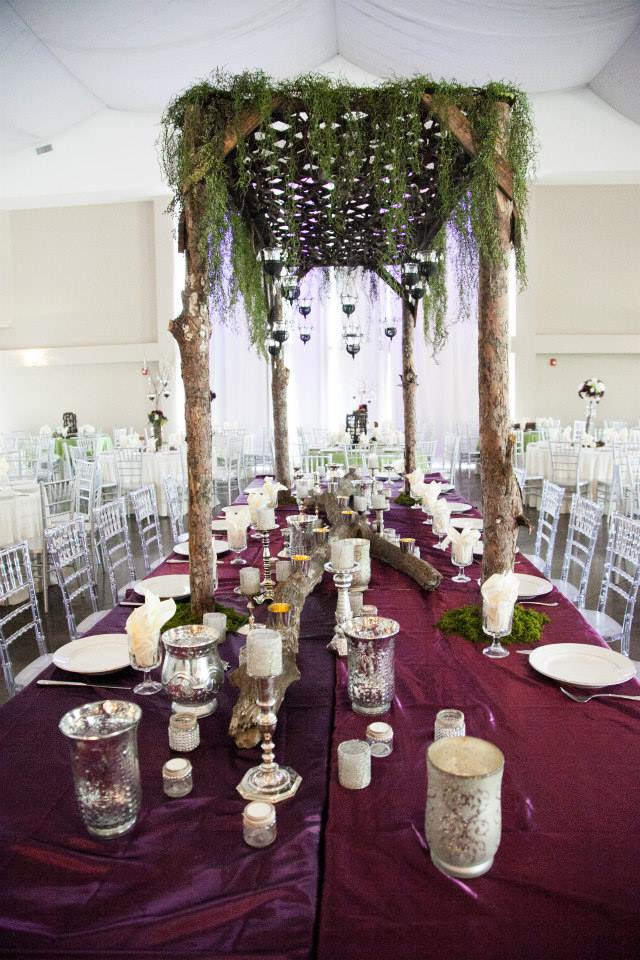
The head table was my favorite DIY out of the whole wedding! This was called “The arbor”, and no we could not talk my sister into a more simple decoration for the head table, so I figured it out! And if your handyman is still available, you may need him for this project too. You will need four rather tall branches/trunks of a tree (preferably very straight, pine is a good tree for straight trunks!). Ours were 5 feet in height, so on top of a table it looked very grand! We screwed in square platforms at the bottom of each for stability. You will also need a wooden lattice (there are white plastic lattices available, and they are lighter than the wood kind but we ended up using a wooden lattice so it wouldn’t sag in the middle of the arbor). We also stapled beams around the edge of the lattice to assure it wouldn’t sag in the middle. From there, I stained the lattice a darker color. We have a willow tree in my front yard so I took some willow branches from it, stripped the leaves from the branches, and weaved them through the lattice. To put this arbor together, you will screw the lattice into the trunks from the top and reinforce stability with side diagonal pieces at the top corners to attach trunks to lattice on each corner (two diagonal pieces for each corner). To give a more green/natural look to the whole thing we purchased plastic “seaweed-looking” swags at Hobby Lobby and stapled them around the top edges! To complete the look, we hung lanterns from the lattice with yellow glowing LED lights and green moss around the bases.
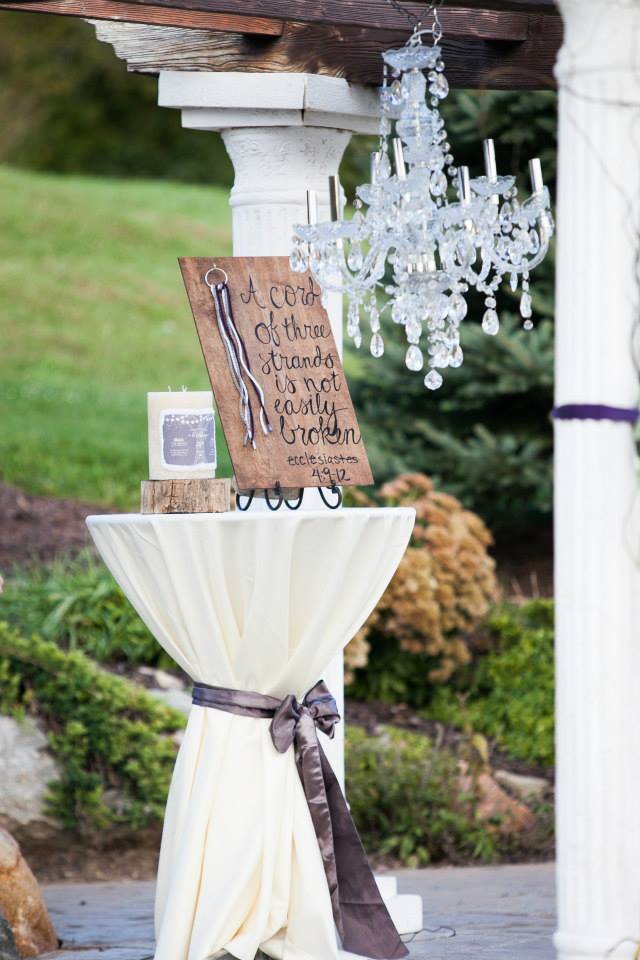
This last DIY was quick and easy! My sister and the groom (now brother-in-law) chose to braid cords during the ceremony, so I made a board with the biblical quote to display the braided cord during the reception. I just stained the wooden board and wrote in a sharpie to make sure the text was crisp. I found a small hook I could screw into the board to hang the braid on. So cute!
{these wedding photos were taken by an awesome local Omaha photographer, Tammy Muecke! I will link up her website below!}
http://www.tammymueckephotography.com/
Share some of your DIY centerpieces!


wow!I am really inspired!these centerpieces and arrangements are really wonderful!
LikeLike
I absolutely love your centerpieces and arrangements. They are beautiful! I was a DIY bride last April and am so glad I decided to go that route because I was able to have my dream wedding with EVERYTHING I really wanted but without going bankrupt! I may just use some of these ideas for entertaining in the future!
Thank you for linking up to the Oh My Heartsie Girls Wordless Wednesday Linky Party!
Wishing you a fabulous week!
xx
Lysa
Co-Host OMHGWW
LikeLike
Everything is so pretty! Thanks for sharing at OMHG WW 🙂
LikeLike
WOW – these are all so gorgeous! My wedding was a very long time ago, but I’m saving this for down the road with my kids. Thank you for sharing them with us at #FoodieFriDIY…pinning and sharing!
LikeLike
Thank you so much for the beautiful inspiration! I’m in the middle of planning my wedding so this post is a fantastic read. Thank you so much for attending week 19 of #PureBlogLove and linking your fantastic blog post, I can’t wait to see what you have in store for our next party, Thursday 8 PM EST- Sundays at midnight. Your post has been added to the #PureBlogLove Pinterest board for all to see 🙂 Have a great day!
Nicole
LikeLike
I’ll bet that head table was stunning in candlelight! Thanks so much for sharing and linking up at the Wildly Original party — I’m inspired!
❤ Christina @ I Gotta Create!
LikeLike
Oh my gosh stunning! My daughter is having a DIY Wedding in 2016 outdoors and so I’m definitely pinning these fantastic ideas for her.
LikeLike
Thanks for sharing @DearCreatives weekly party your post is being featured this week! Hope to have you drop by to see your feature, grab a featured button if you like + feel free to share again!
LikeLike